
List
The List tab in Pragmatic Studio is used to configure the properties of the list field type, similar to the Prompt field configuration. Here, specific options and behaviors are defined that allow users to access, view, modify, and even create new records through this field.
Settings
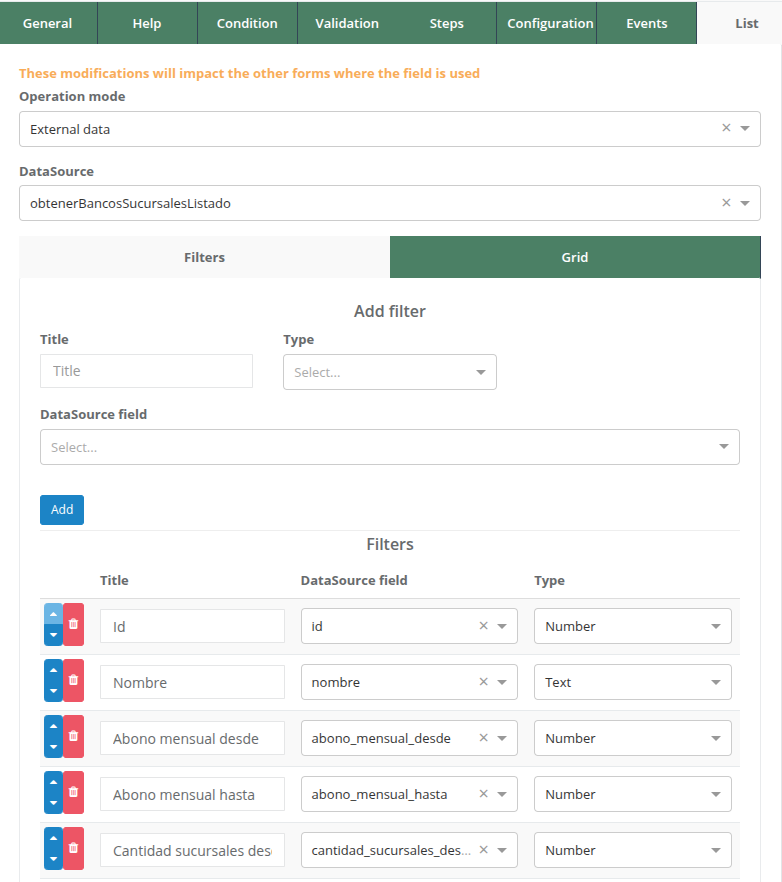
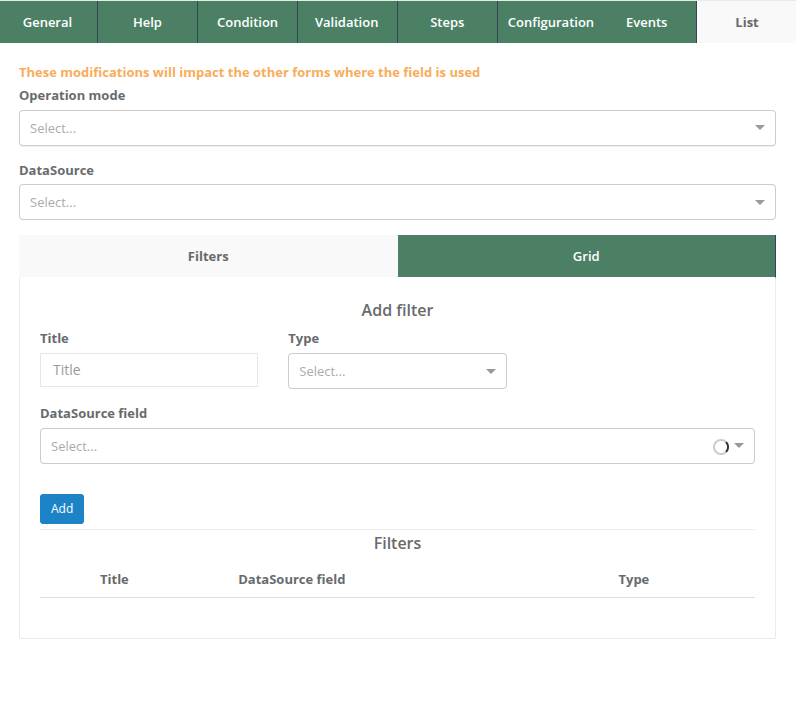
Operation mode
There is a field called Operation mode, which has two options:
- External data: When the data to be displayed in the list comes from a datasource that points to an SQL or MongoDB database, or a JavaScript function.
- Instances: When the data to be displayed in the list comes from a datasource that points directly to Pragmatic instances under the same environment where the list is located. For more information about environments, see the Environments page. This datasource must point to the same Pragmatic MongoDB database and the same collection of form instances under the same environment to work correctly.
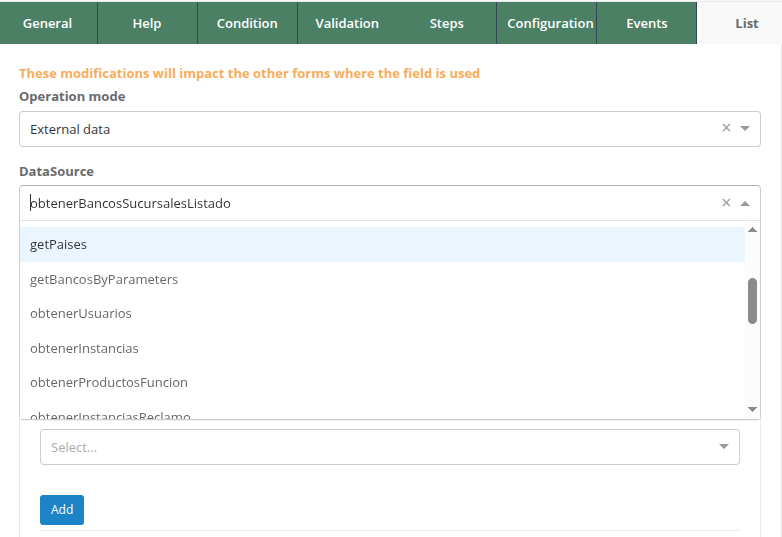
DataSource
- DataSource: This is the field to select the datasource with which the data search will be performed.
Filters Tab
The configuration of this tab is exactly the same as the Prompt Filters tab. Here, the filters that will be executed to perform the data query are defined:
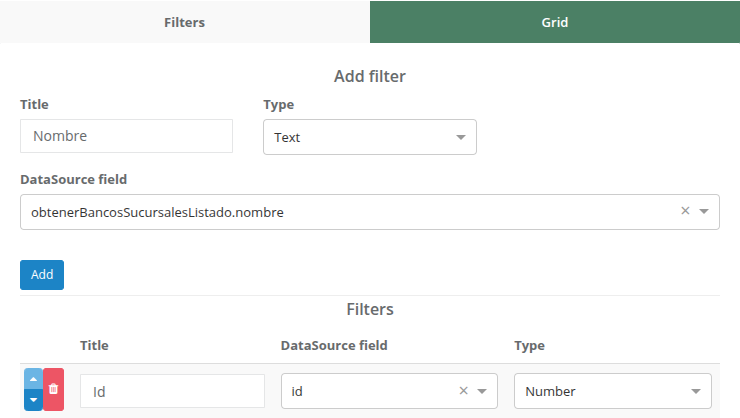
- Title: The descriptive title of the filter.
- Type: The data type of the filter, which can be number, text, boolean, or date.
- DataSource field: The input field of the datasource to which the filter will point.
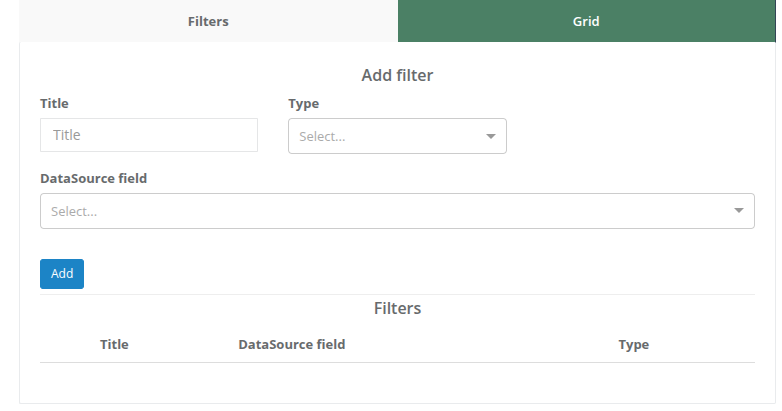
Add filter Section
Here you can add the necessary filters for the query.
Filters Section
Displays all added filters, allowing them to be sorted, modified, and deleted.
Grid Tab
In this tab, the columns to be displayed from the query data will be defined, as well as configuring the behavior and actions of the list on the queried data.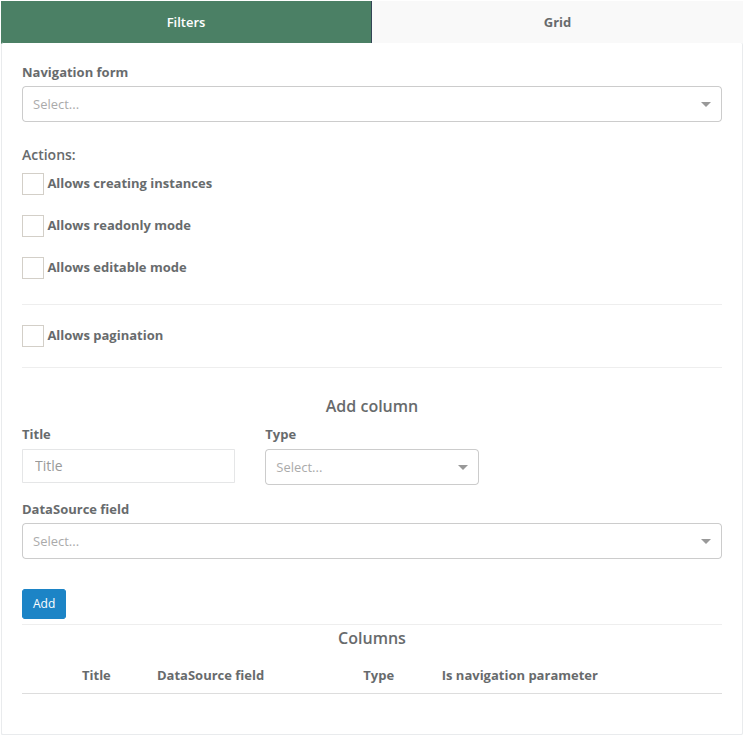
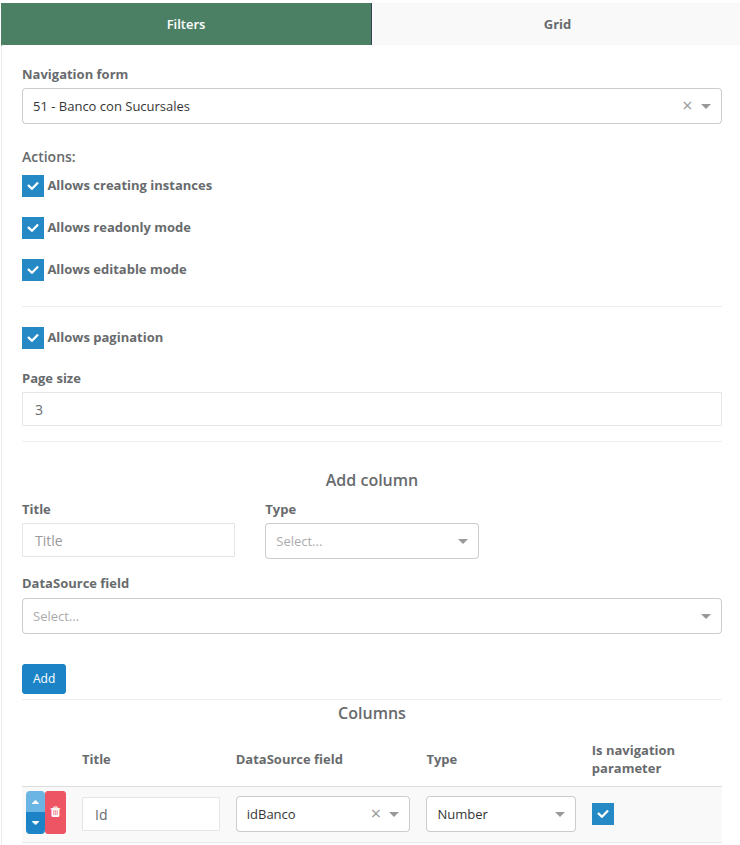
Navigation form
It is a dropdown that displays all Pragmatic forms. Here, you select the form to navigate to its instance when the user presses a specific action on the data, whether to navigate in read-only mode to view data, modify data by entering input mode, or create a new record.
Actions Section
This section contains the following fields:
- Allows creating instances: Field to activate the action of creating instances when the list is rendering. It is a button that displays the + symbol, and when pressed, a new instance of the form selected in “Navigation form” will be created and navigated to for data editing.
- Allows readonly mode: Field to activate the action of accessing readonly mode, i.e., read-only to view data without modifying it.
- Allows editable mode: Field to activate the action of accessing editable mode, to modify data.
- Allows pagination: This option should only be activated if the associated datasource has implemented the LIMIT and OFFSET parameters to paginate results correctly, in the same way as used in the Prompt tab
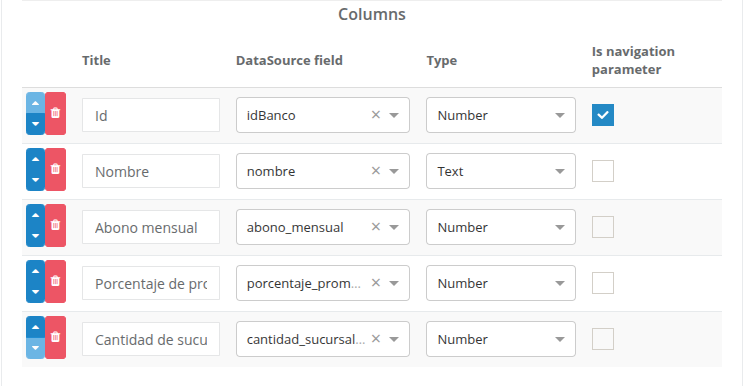
Columns Section
Displays the added columns and allows modifying their display order.
Each column has an option called Is navigation parameter which displays a checkbox to activate if this data is to be used to search for the individual data once in the selected navigation form instance. The selected navigation parameter values are accessed under the @parameter parameter.
For example, if the “id” output field of the datasource is selected as a navigation parameter, then it can be accessed from the navigation form instance using @parameter.id.
Configuring a List
Before proceeding with the configuration of a List, it is important to ensure that a compatible datasource will be used. This datasource must be correctly defined with input and output parameters provided by Pragmatic Studio.
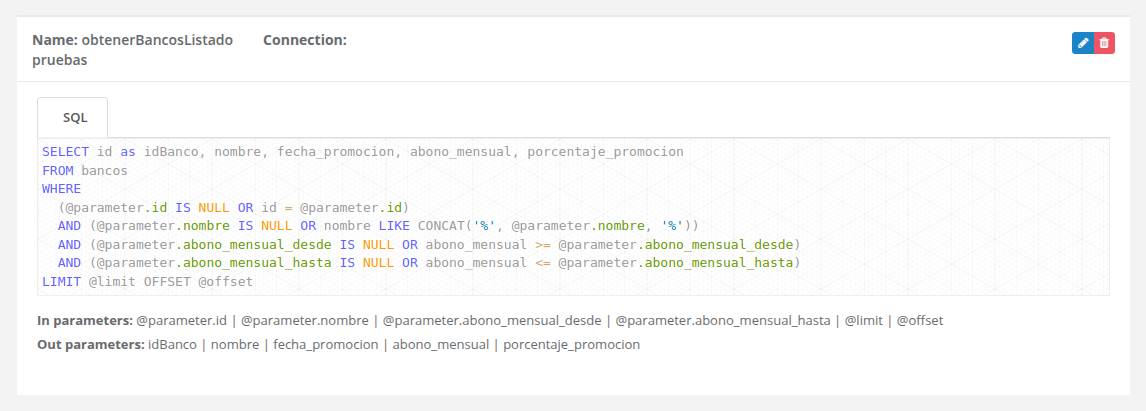
In this case, we will work with a datasource that points to an SQL table, whose columns are as follows:

So the datasource, defining some filters on these columns, would be as follows:
Step 1: Create individual form
The individual form is the form whose instances will be navigated to when the user uses one of the three available actions from the list: read-only mode, editable mode, and create new record. Therefore, it is necessary to start by creating this form.
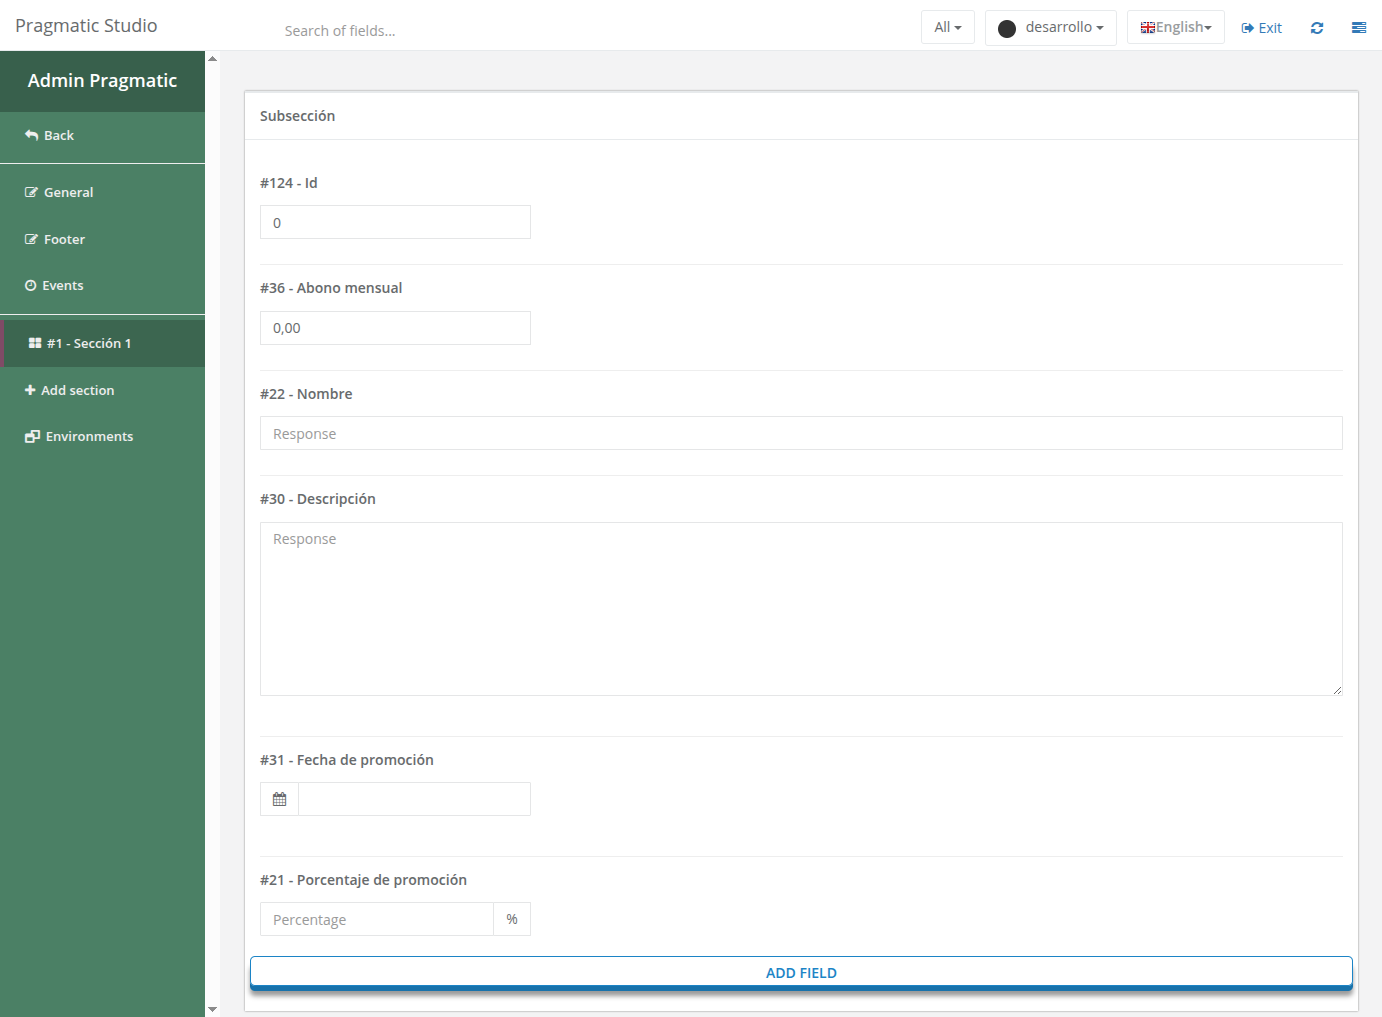
Step 2: Create fields in the individual form
Once the form is created, the following fields are created, taking into account the table columns.
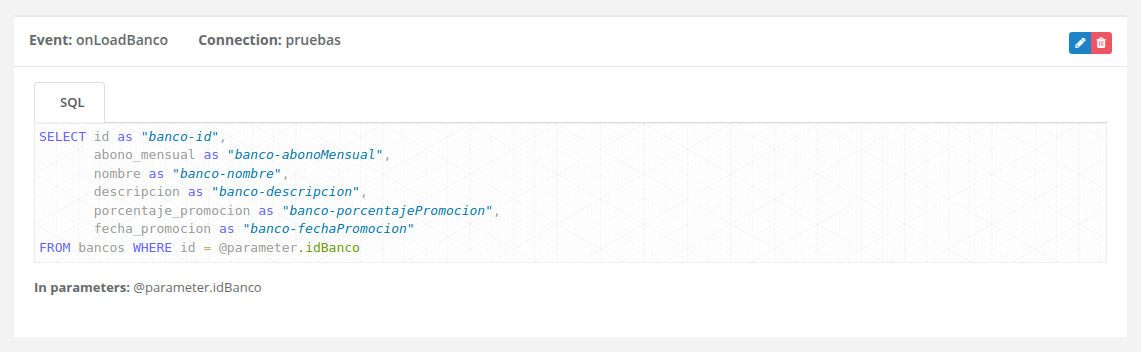
Step 3: Create data preload event
The data preload event will be used to load the data once the user accesses an instance of a record selected from the list. For more information about this event, please refer to the Data Preload Event documentation.
Step 4: Create event to create or modify record
An event needs to be created that executes when a specific action is pressed on the individual form instance. The purpose of this event is to obtain the data entered by the user in the instance and send it to the SQL table.
In this case, the list to be configured should allow read, modify, and create data actions. Therefore, an event will be created that points to the SQL table and executes an upsert, which searches for a value with the same identifier sent by Pragmatic (the Id field with unique name banco-id) and if such a record does not exist, it will create a new one with the data sent by the user.
This structure allows the data entered by the user in the form to be sent correctly to the database, using the current values of each field according to user interaction.
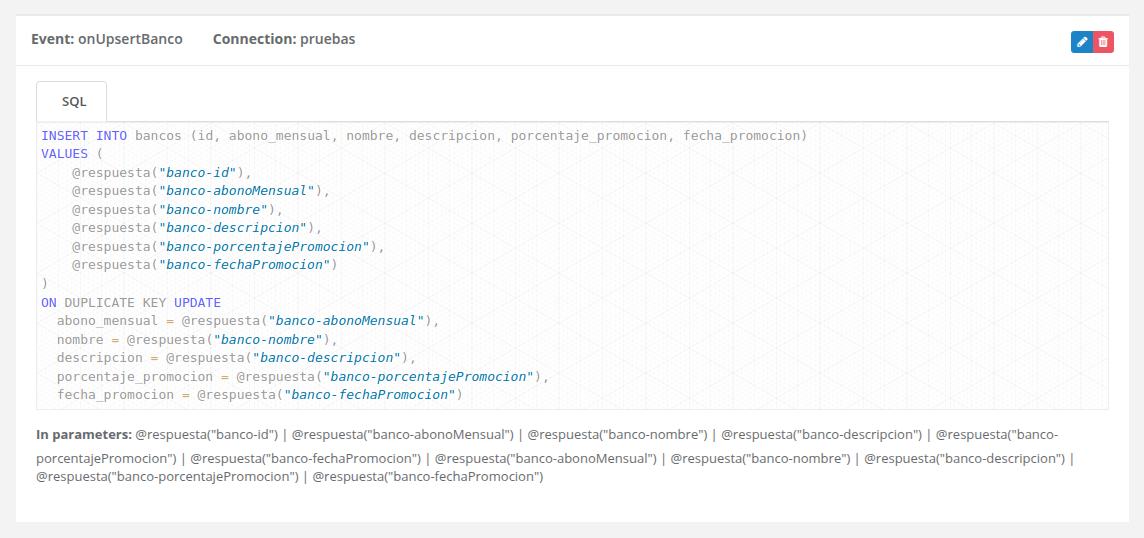
Explanation of the event’s SQL statement
In the SQL statement shown, parameters like @respuesta("banco-abonoMensual"), @respuesta("banco-nombre"), etc., are used. These parameters refer to the responses the user enters in the individual form fields. Each parameter uses the unique name of the field to identify which response is being accessed.
For example, @respuesta("banco-abonoMensual") gets the value the user entered in the field whose unique name is "banco-abonoMensual". The same applies to the other fields used in the statement.
- If you want to know more about unique names and how they are configured, consult the Unique name property.
- For more information on using the
@respuestaparameter, visit the @respuesta section in the parameters documentation.
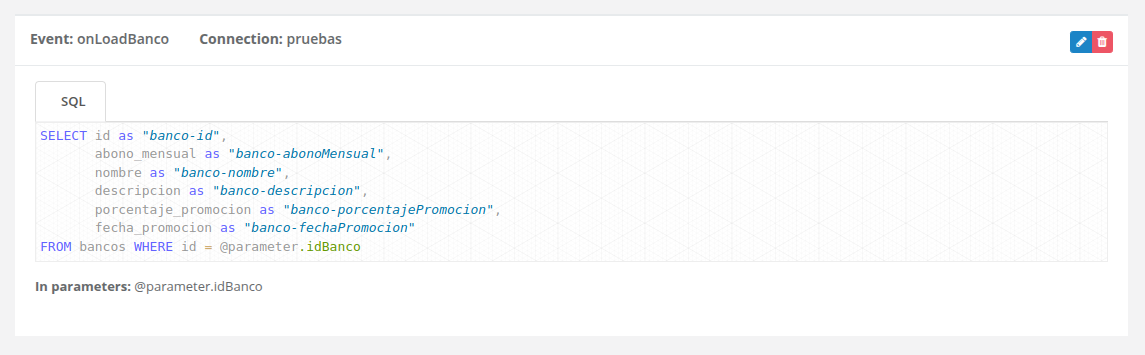
Step 5: Create event to load data
Subsequently, to ensure that the form instance loads the record’s data upon navigation, a data preload event must be created to obtain and map the data to each field.
For this case, the Unique name property of the fields will also be used to indicate the fields to map. If you want to know more about the data preload event, consult the Data Preload Event page.
In this example, a navigation parameter called idBanco is being used, which represents the unique identifier of the bank to be queried. This parameter is essential for loading specific data of the instance selected from the list.
The idBanco parameter must be defined as an output field in the list’s search datasource and also marked as a navigation parameter in the list’s column configuration. This way, when the user selects a record in the list, the idBanco value will be automatically sent to the individual form, allowing the data preload event to perform the correct search and mapping of the corresponding record.
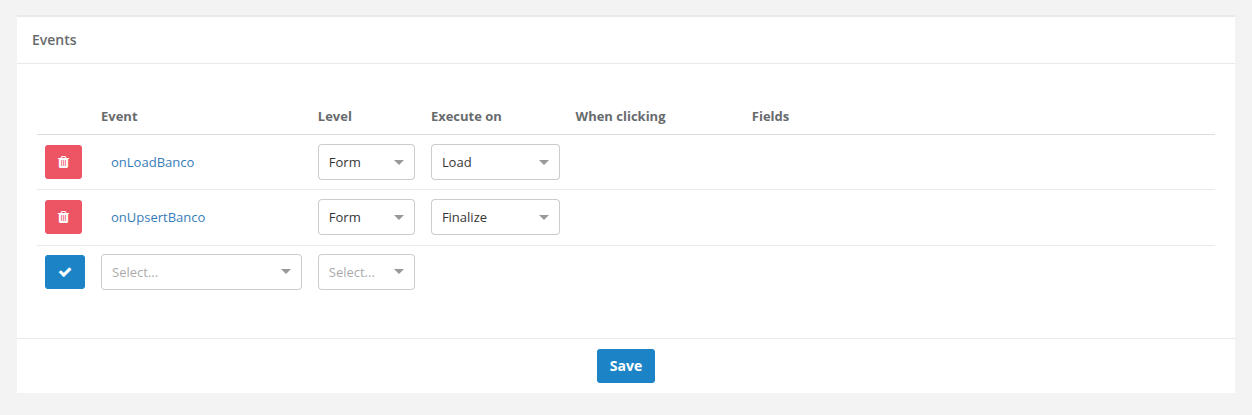
Step 6: Associate events with the individual form
Finally, in the individual form, it is necessary to associate the two events created in the previous steps so they are used correctly:
- The
onLoadBancoevent must be configured to execute at the load moment of the form, thus allowing the preloading of the selected record’s data. - The
onUpsertBancoevent must be configured to execute at the finalize moment of the form, so that the data entered or modified by the user is saved correctly in the database.
This way, the individual form will be fully integrated with the list and the database, ensuring the correct loading and updating of records.
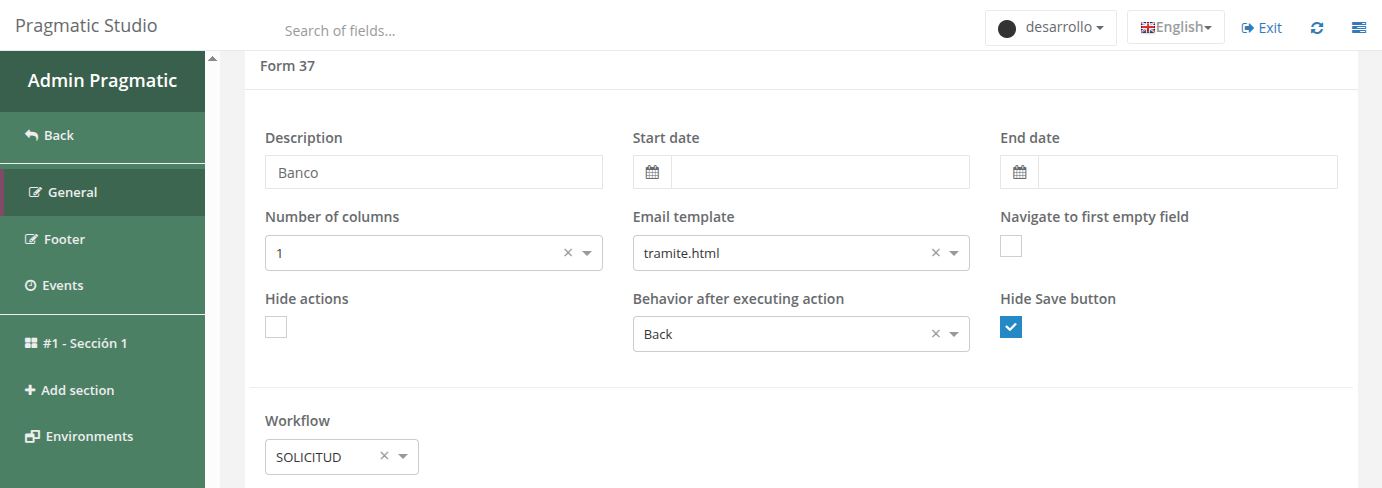
Step 7: Create form to display the list
Finally, a new form must be created that will contain the list field type. This example form will be used solely to display the list, so it does not need to have actions available in its form instances.
To achieve this, it is recommended to deactivate actions using the Hide actions option in the form’s general settings.
This way, the form will only display the list and will not allow additional actions on the instances.

Step 8: Create section, subsection, and list field type
In the form created in the previous step, you must add a new section and a subsection within it. Subsequently, create a new list type field within that subsection.
This list field will be responsible for displaying records and allowing navigation, editing, and creation of new instances according to the configuration done in the previous steps.
Once created, click on it and navigate to the List tab in the side configuration panel.

Step 9: Select operation mode
Select the type of datasource that will be used for the list query. If the datasource points to the same Pragmatic database for form instances, choose the “Instances” option. Otherwise, if the datasource points to an external database (SQL or MongoDB) or a JavaScript function, select the “External data” option.

Step 10: Select DataSource
Select the datasource that will be used for the List query. Ensure that the datasource has defined input and output parameters to map search filters and columns to display. To learn more about datasources, visit this Datasource Introduction.

Step 11: Configure Filters
- Navigate to the “Filters” tab.
- In the “Add filter” section, define the filters to be used for the search. Specify the input parameters for each filter and press the “Add” button to add it.
- Optionally, make additional modifications in the “Filters” section if it is necessary to correct or change the order of the filters.
Step 12: Configure Grid
- Go to the “Grid” tab.
- Configure the navigation form to which it will navigate once an action is pressed.
- Activate the actions you want to allow in the list, such as Allows creating instances, Allows readonly mode, and Allows editable mode.
- Activate pagination if the datasource allows it. For more information on pagination, see the Allows pagination section.
- In the “Add column” section, add the columns of the data to display. Define the output parameters for each column, mapping them with the datasource columns, and press the “Add” button to add the column.
- Optionally, make additional modifications in the “Columns” section to adjust the order, correct details of the created columns, or select the navigation parameters to use.
Step 13: Save Configuration
Once the configuration is complete, make sure to press the “Save” button in the side configuration menu to save all changes made.