
Grid
The Grid tab in Pragmatic Studio is where the specific functionality of the grid field is configured. Here, several key aspects related to the grid used in the form are defined. The available fields and sections in this tab are as follows:
Settings
Data source
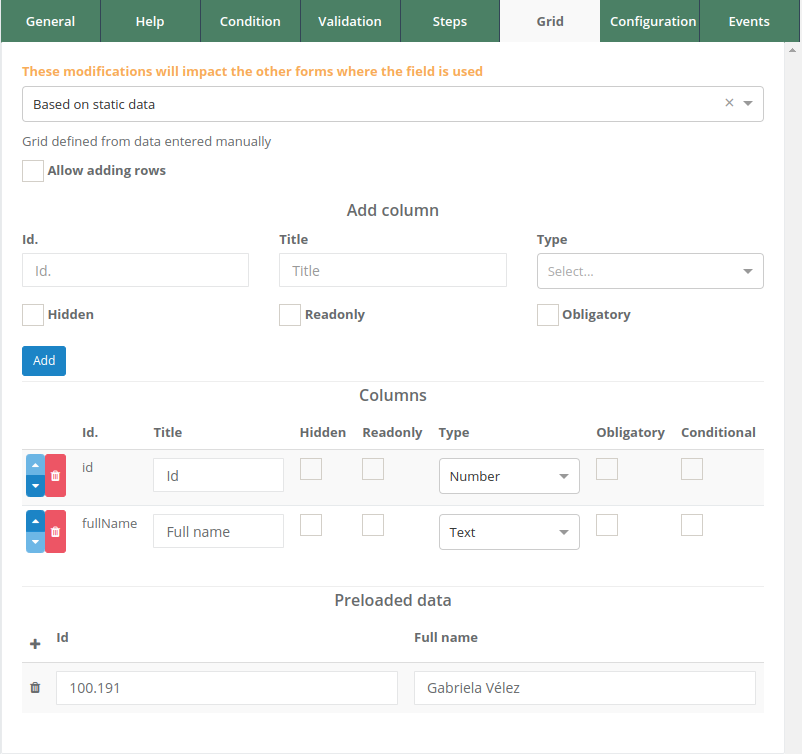
Based on static data: This option means that the data displayed in the grid will be manually added from the same configuration window, without being fetched from any external data source.
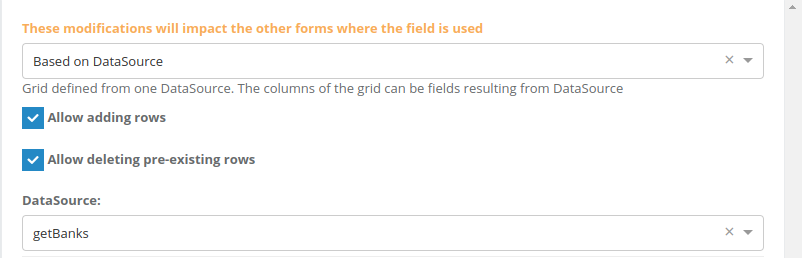
Based on DataSource: This option indicates that the data for filling the grid will be obtained from a datasource previously defined in the system. To learn more about datasources, visit this link.
Features
Allow adding Rows
A selection field that determines whether the user is allowed to add new rows to the grid while filling out the form.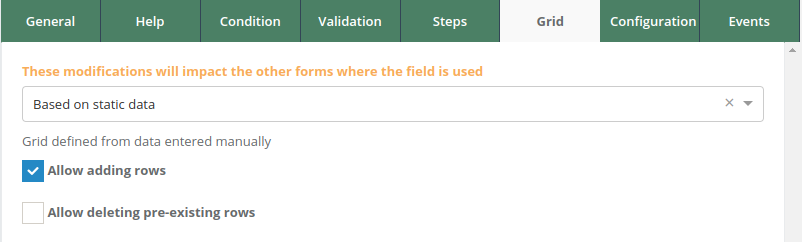
Allow deleting pre-existing rows
Another selection field that indicates whether the user can delete previously created rows in the grid. This option appears only if the “Allow adding rows” option is selected.
Datasource
A selection field that appears only for grids based on a datasource. Here, you specify the datasource from which the data will be retrieved to populate the grid.
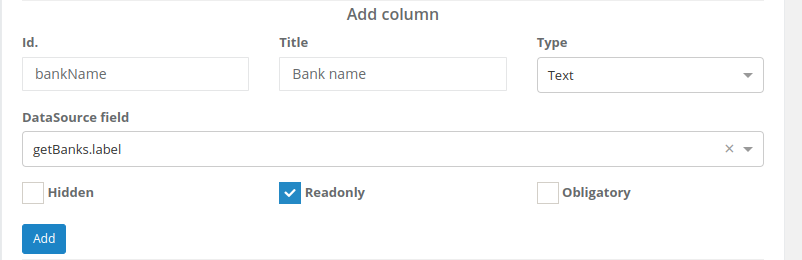
Add column section
In this section, the columns that will be displayed in the grid are defined. The fields include:
- Id: The key for the column.
- Title: The descriptive title of the column.
- Type: The type of data the column will contain, which can be number, text, percentage, boolean, or date.
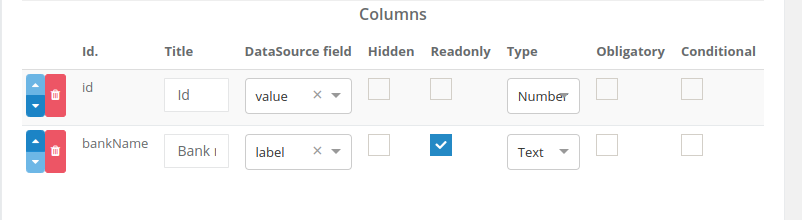
Columns section
This section displays the previously added columns and allows for adjustments. For each column, the following can be specified:
- Obligatory: The column field must be filled out.
- Hidden: The column field will not be displayed to the user.
- Readonly: The column field cannot be modified.
- Conditional: The column field has a condition for being displayed, using the same logic as in the Condition tab.
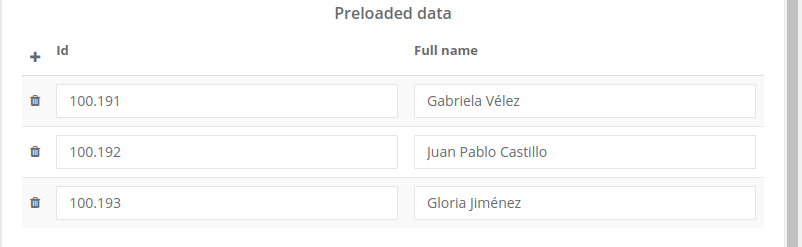
Preloaded data section
This section appears only for grids based on static data. Here, the values that will be displayed in the grid with the previously created columns are defined.
Configure grid
Step 1: Select data source
- Select the data source, depending on whether it is based on static data or a datasource.
- Additionally, you can configure the grid behavior with the two options for adding and deleting pre-existing rows.
- If the grid is based on a datasource, select the datasource in the selection field.
Step 2: Add columns
- Go to the “Add Column” section.
- Fill in the fields for ID, Name, and Data Type for each column you want to add.
- Select additional column attributes, such as whether it is obligatory, hidden, or readonly.
- If the grid is based on a datasource, select the datasource column to which the new column will be mapped.
- Press the “Add” button to add the column.
Step 3: Configure columns (Optional)
In the “Columns” section, you can make additional modifications or add specific conditions for each column as needed.
Step 4: Add preloaded data (for grid based on static data)
- Go to the “Preloaded Data” section.
- Press the “+” button in the upper left corner of the table to add a new row.
- Enter the required values for each grid row.
Step 5: Save configuration
Once you have completed the grid configuration, be sure to press the “Save” button in the side configuration menu to save all changes made to the grid settings.