Condition
The Condition tab is used to determine the visibility of the selected field based on a specific condition defined by the user. This functionality is crucial for customizing the user experience and displaying only relevant fields according to predefined conditions.
Fields
The available fields in this tab are as follows:
1. Code Line
This field displays the condition being specified using the buttons provided below. It is also possible to directly edit the condition through this code line.
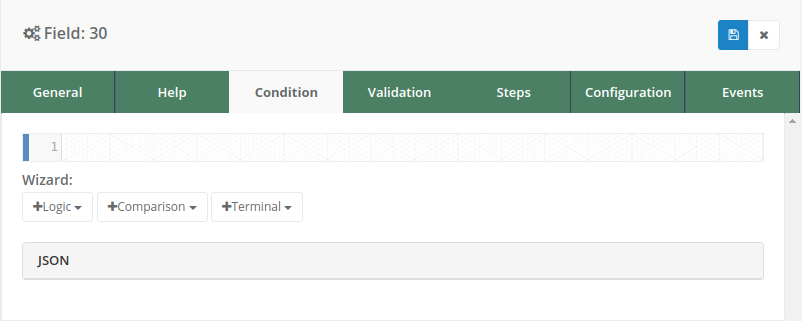
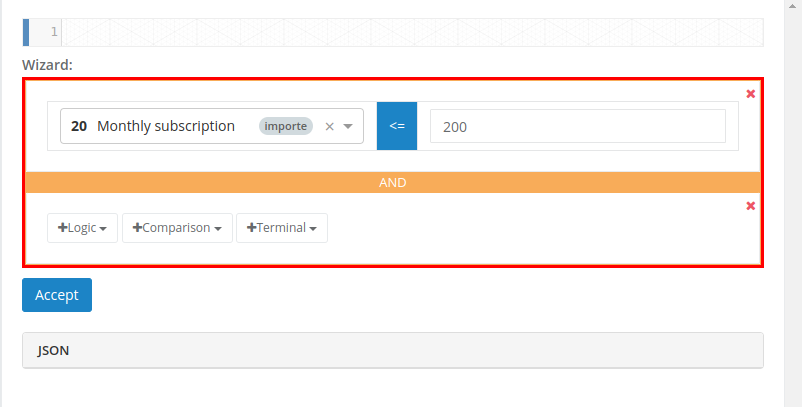
2. Wizard
This set of three buttons is used to create the desired condition.
2.1 Logic
Allows adding multiple conditions and specifying how they should be met. It offers three options:
- ‘AND’: All conditions must be met.
- ‘OR’: At least one condition must be met.
- ‘NOT’: None of the conditions must be met.
These options can be combined as needed.
2.2 Comparison
Used to create conditions using different comparison operators. The options include:
- (==): Equal to
- (!=): Not equal to
- (<=): Less than or equal to
- (>=): Greater than or equal to
- (<): Less than
- (>): Greater than
These operators are used to compare the values of the selected fields.
2.3 Terminal
Specifies the data to be compared. It offers nine options:
- Text:
To compare with a text value. - Boolean:
To compare with a boolean value, i.e., true (yes) or false (no). - Number:
To compare with a numeric value. - Response:
To compare with the response given in another field. Note that only responses from fields that appear before the selected field can be used, not those that come after. - Business Key:
The client ID of the form instance. - Parameters:
Various parameters available for the form. - Form Id:
The ID of the form. - Form header:
Data set in the form header. - Form initial data:
Data set in the initial form data.
These fields and options allow users to define specific conditions to determine when and how the selected field will be displayed, providing greater flexibility and customization in form creation.
3. JSON
Displays the created condition in JSON (JavaScript Object Notation) format.
Creating a Condition
Step 1
Select a value to compare using the “Terminal” button and choose one of the available options. For example, select a response field.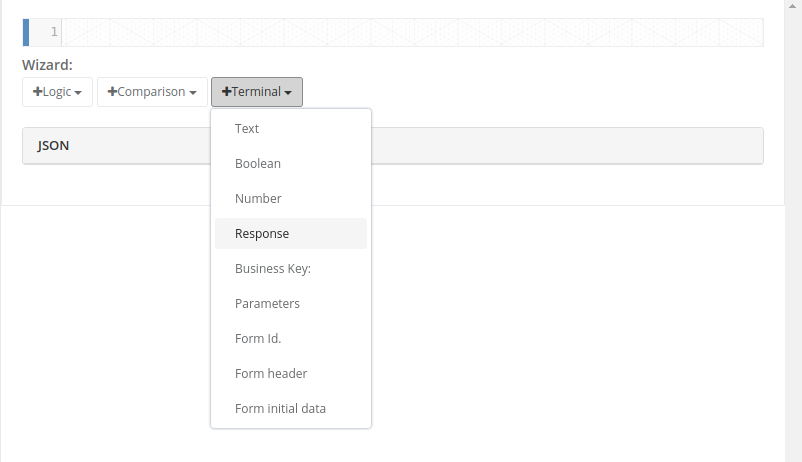
Step 2
Choose the field you want to evaluate from the available options.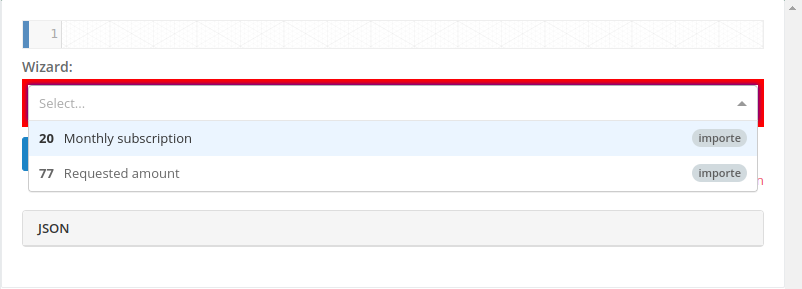
Step 3
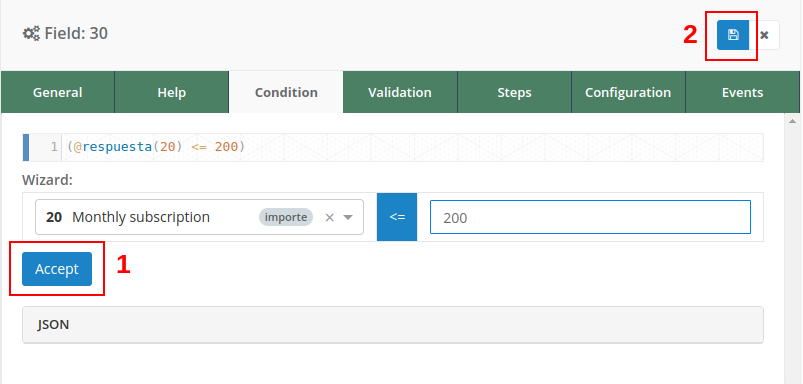
Select a comparison operator for this field. For example, if you want the selected field to be less than or equal to a value, choose the “<=” operator.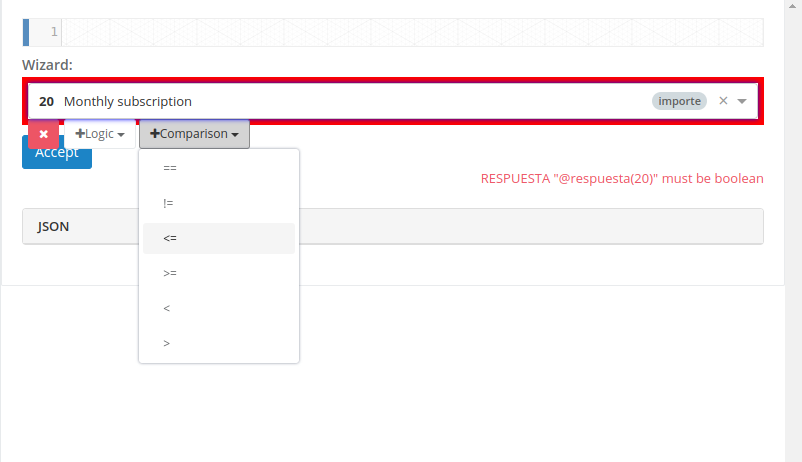
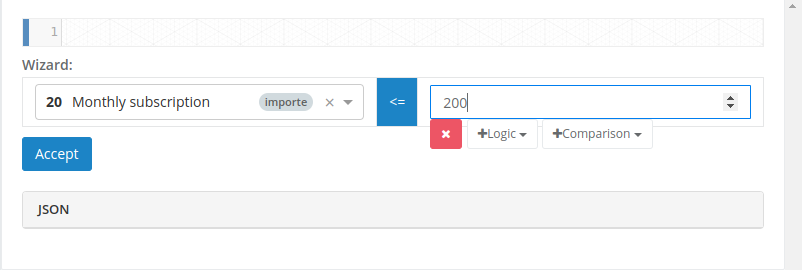
Step 4
Now that you have this comparison, select the new field you want to compare with the field selected in the previous step. Use the “Terminal” button again and add the corresponding value. For example, if the field selected in Step 2 is numeric, choose a numeric field and add the value. In this case, select that the new field should be less than or equal to 200.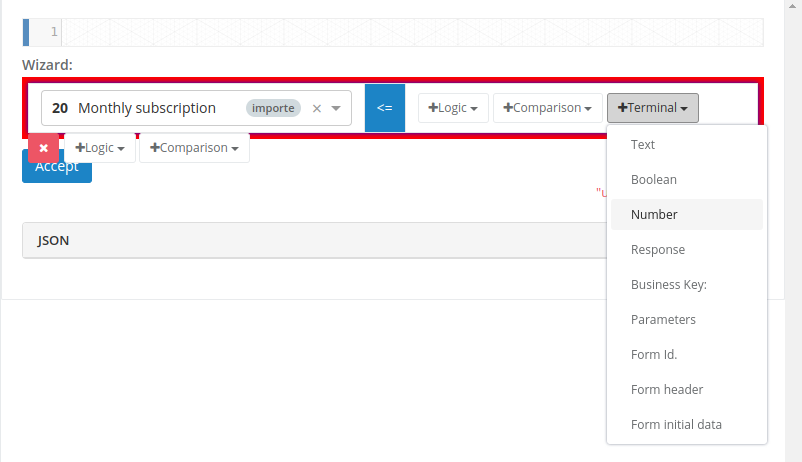
Step 5 (Optional)
If you want to add more conditions, place the cursor over the created condition and press the “Logical” button. Then, choose one of the available options. A new empty condition will be created below the existing condition for you to complete following the previous steps.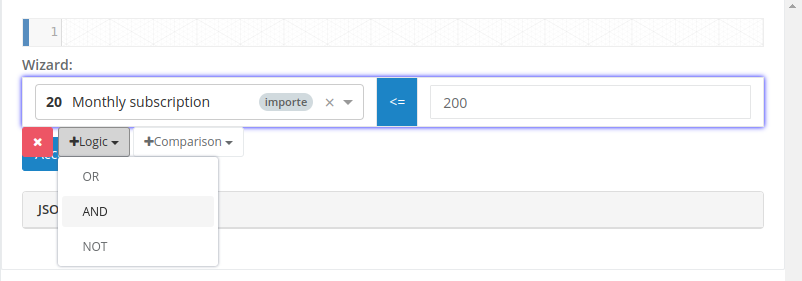
Step 6
Once configured, press the “Accept” button to add the condition, and then press the Save button in the side configuration window to save the condition in the field.